But when these units fail, the solution often lies in simple troubleshooting steps. This how-to guide provides practical fixes for three devices: a Samsung refrigerator, an Oregon Scientific RM806 clock, and a Dixell refrigeration controller.
How to Fix a Samsung Refrigerator That Isn’t Cooling Properly
When your fridge stops keeping food cold, panic sets in quickly. For models like the Samsung RF28R7351SR, owners often turn to the manual Samsung fridge to get step-by-step help. If you don’t have the guide nearby, here’s what you can try.
Step 1: Check the Power Supply
Ensure the fridge is firmly plugged into a dedicated outlet. Avoid using extension cords or power strips, as these can cause power fluctuations that disrupt cooling.
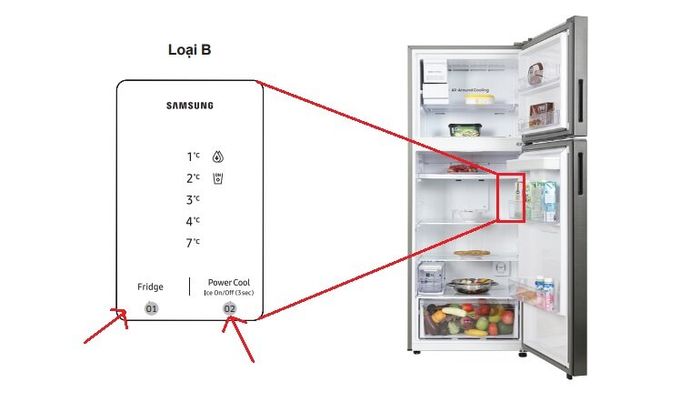
Step 2: Adjust the Temperature Settings
For Samsung models, the recommended setting is 37°F (3°C) for the fridge and 0°F (-18°C) for the freezer. If the control panel has been accidentally changed, reset the temperatures.
Step 3: Clean the Condenser Coils
Dust and debris clogging the condenser coils make the compressor work harder and reduce cooling. Unplug the fridge, pull it away from the wall, and vacuum the coils gently.
Step 4: Inspect the Door Seals
Worn or dirty door gaskets allow cold air to escape. Run your hand along the edges of the doors—if you feel cold air leaking, wipe the seals with warm soapy water and replace them if damaged.
Step 5: Reset the Refrigerator
Hold the “Power Cool” and “Power Freeze” buttons together for 10 seconds. This resets the control board. The manual Samsung fridge outlines specific reset steps for each model.
Pro Tip
Don’t overload the fridge. Proper airflow around food containers ensures consistent cooling throughout the compartments.
How to Reset an Oregon Scientific RM806 Projection Clock
The Oregon Scientific RM806 is a multifunctional clock that projects time onto walls or ceilings and syncs with radio-controlled signals. When it stops syncing or shows the wrong time, the oregon scientific clock rm806 manual offers guidance, but here’s a simplified approach.
Step 1: Replace the Batteries
Weak batteries are the most common reason for screen dimming or failure to sync. Replace them with fresh alkaline batteries and check if the display stabilizes.
Step 2: Trigger a Manual Sync
The RM806 automatically receives radio signals, but interference can prevent syncing. Place the clock near a window, away from routers and cordless phones. Hold the “Wave” button until the signal icon flashes—this forces a manual synchronization.
Step 3: Reset the Unit
If syncing still fails, remove the batteries and unplug the power adapter for several minutes. Reinsert power and reset the time zone and daylight savings settings. The oregon scientific clock rm806 manual shows where the reset button is located for a full factory reset.
Step 4: Adjust the Projection Feature
If the projected time is blurry or upside down, use the focus wheel or the 180° rotation button. These adjustments are detailed in the manual but can usually be done without tools.
Pro Tip
Keep the clock at least 6 feet away from metal surfaces and other electronics. This reduces signal interference and helps accurate time reception.
How to Calibrate and Maintain a Dixell Refrigeration Controller
Commercial refrigeration units often rely on models like the Dixell XR20CX or XR60CX. When temperatures fluctuate or alarms appear, technicians consult the dixell controller manual. Here’s a practical process you can follow.
Step 1: Verify the Sensor Probes
If the display shows unrealistic values, inspect the temperature probes. Loose connections or damaged cables cause erratic readings. Replace the probe if the insulation is cracked or wires are frayed.
Step 2: Compare Actual and Displayed Temperatures
Place a calibrated thermometer inside the unit and compare it to the controller’s display. If there’s a consistent difference, adjust the offset parameter in the programming menu. The dixell controller manual explains how to enter programming mode and set the correct offset.
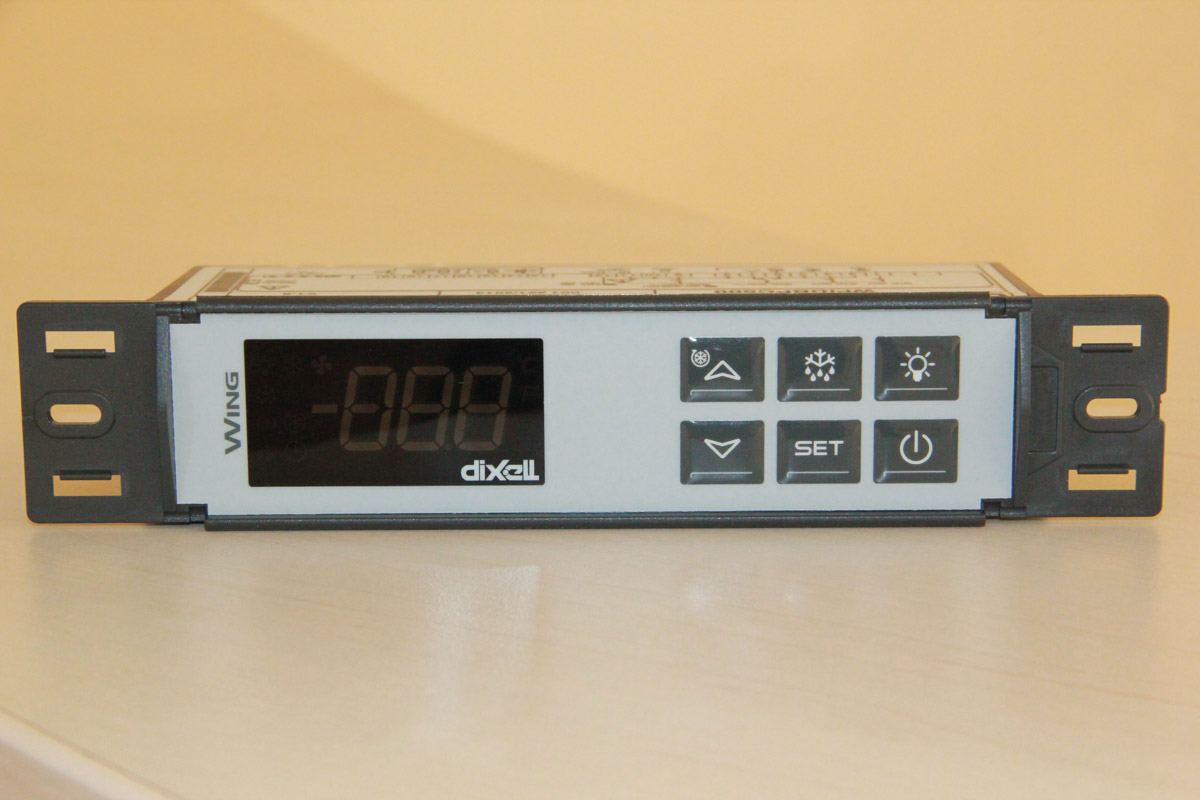
Step 3: Reset to Factory Defaults
If settings have been altered incorrectly, restore the controller to factory defaults. Press and hold the “Set” and “Down” buttons together for a few seconds to enter programming, then select the reset option. Reprogram setpoints and defrost cycles afterward.
Step 4: Ensure Power Stability
Unstable voltage can cause the controller to reboot. Check the wiring and install surge protection if fluctuations are common.
Step 5: Clean the Environment Around the Controller
Moisture, dust, or oil buildup on the device can lead to malfunction. Wipe the unit with a dry cloth and ensure the panel enclosure is sealed against condensation.
Pro Tip
Maintain a log of all controller settings. This ensures you can quickly restore parameters after resets or replacements without relying solely on memory.
Everyday Fixes Made Simple
From restoring cooling in a Samsung RF28R7351SR refrigerator using the manual Samsung fridge, to resetting an Oregon Scientific RM806 projection clock with the help of the oregon scientific clock rm806 manual, to calibrating a Dixell XR20CX controller by following the dixell controller manual, most problems can be solved with a few careful steps. By combining good maintenance practices with the manufacturer’s manuals, you can keep your essential devices running smoothly and extend their life span.